Custom content types and views are a powerful tool in Drupal. With a little planning you can have your data live in one place, and display it in multiple areas of your website.
The following is a guide to demonstrate how to set up a custom content type, and pull that data into a custom view using The College Drupal Distribution.
Sometimes a custom content type would be useful for content creators, but it does not necessarily require a custom view. See the example below for more details.
Content types
A content type is the organizational structure of some related data, a collection of fields that relate to each other.
Plan and create a custom content type
The first step is to plan and create your custom content type. Consider the fields you would need for a complete webpage, and types of content that need to be displayed to the user.
Example: A unit has several faculty conducting research, and would like to provide a standardized template for content creators to display this research. We require a research overview page (the custom view), sorted by the most recent research first, with a short description of the research. The research details page (the custom content type) will have a main content area, an image, and an additional side area for content.
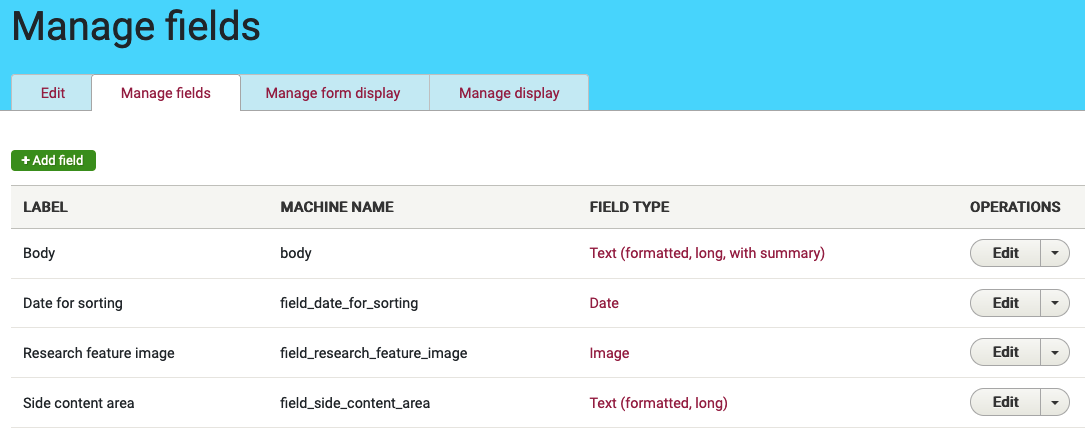
In our example, the custom content type "research" has 4 fields.
- "Body", our main content area, is field type "Text (formatted, long, with summary)". This provides 2 fields, a short summary and the main content area. The short summary will be pulled into the research overview page.
- "Date for sorting" is a data point the user will not see, our view will use this to sort research by date.
- "Research feature image" is an image for both the overview and details page.
- "Side content area" is a long formatted text field for additional content in the details page.
Confirm under "Manage Display" > "Layout Options" that "Use Layout Builder" is checked, if so the "Manage layout" button will provide a UI to organize the layout of the research details page.
The "research" custom content type creates the research details page, it does not require a custom view, since all the data specific to that details page lives on the page itself and can be accessed.
A custom view is required to pull data from different research details pages into the overview page.
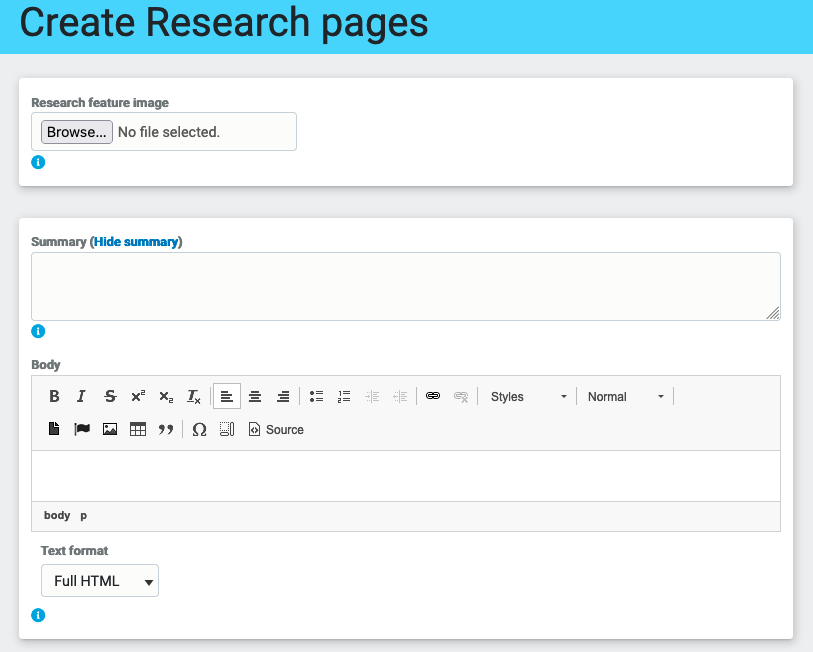
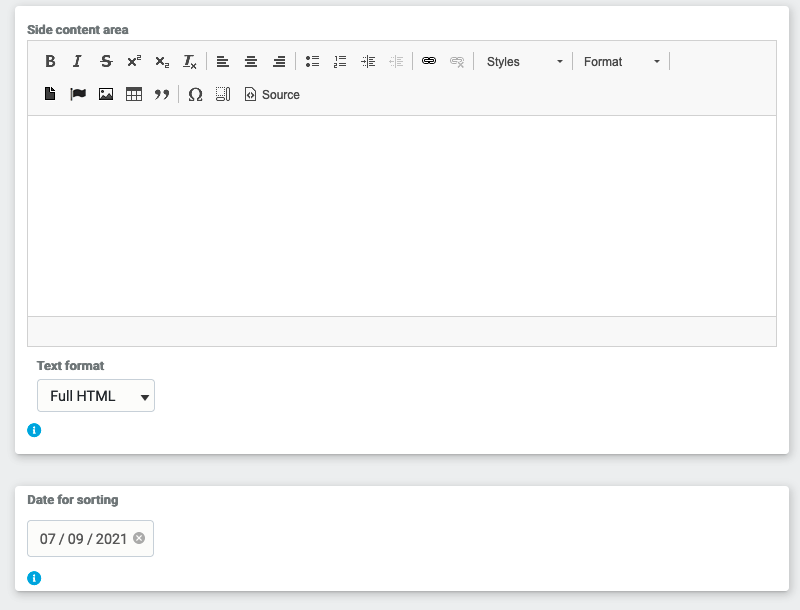
Example: The "research" custom content type has been created, a content editor will see these options when they create a new research details page:
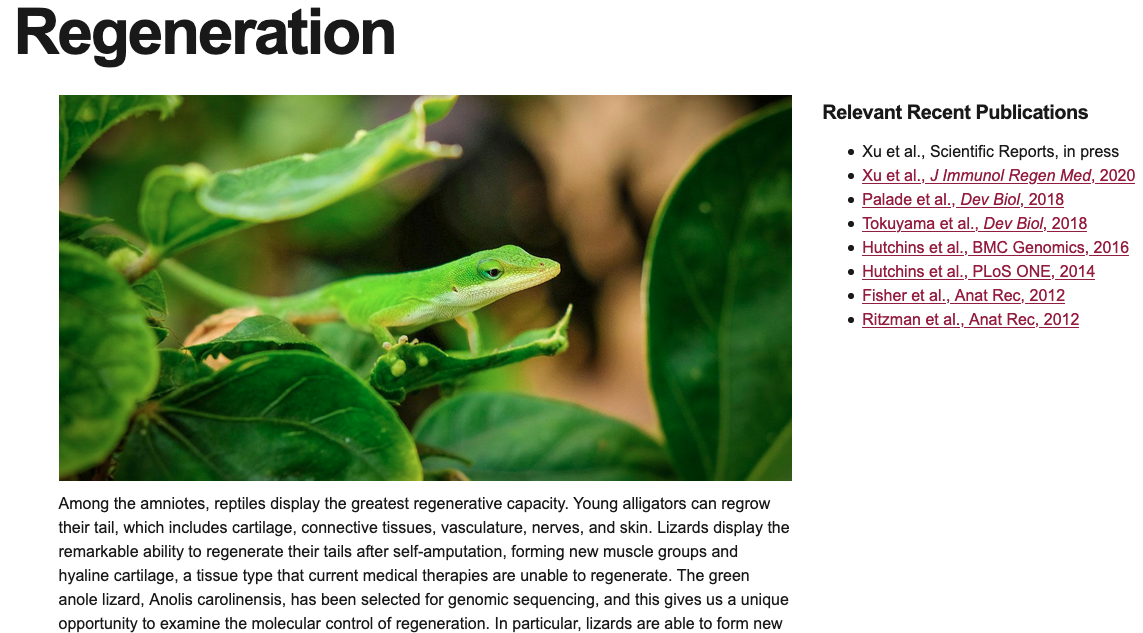
The published page, with all fields completed, feature image, main content, and side content:
Pull your custom content type fields into a custom view
Once the custom content type has been created, the fields are available to pull into a custom view.
In the example above, the summary field and date field were both filled out, but not displayed on the research details page. We can pull the summary field field into the research overview page and use it as a teaser, and use the date field to sort the research.
- In the admin menu, visit "Structure" > "Add view", name the view
- "View Settings" - Show: "Content" - of type: "Your custom content type"
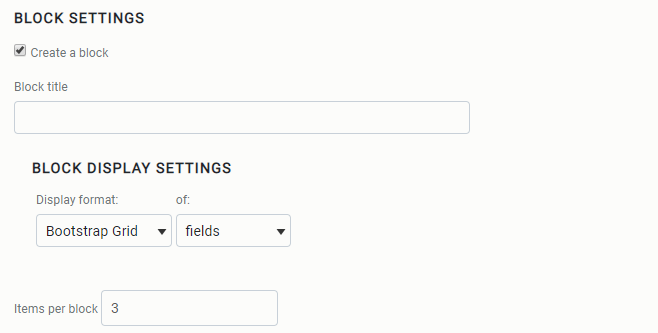
- Check "Create a block", this allows the view to be added to multiple pages if needed.
Once the view is created, you'll have many options:
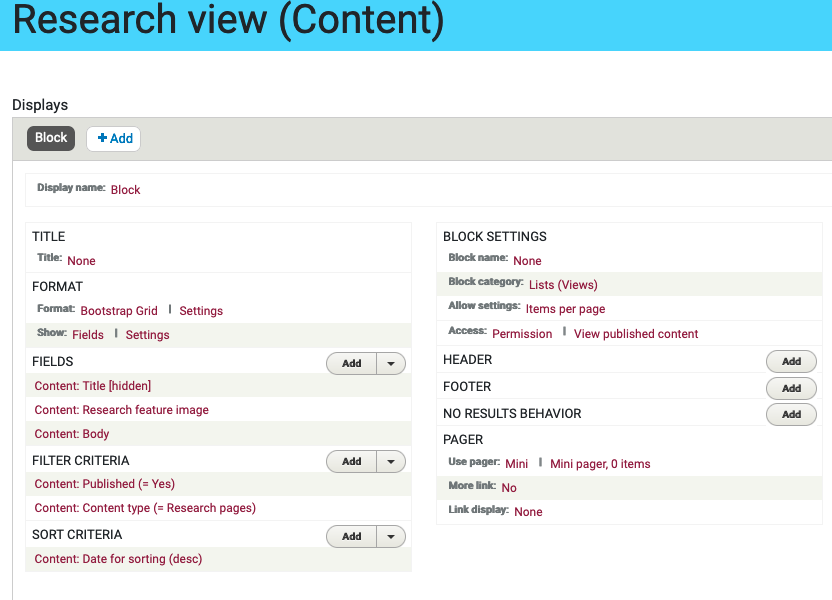
Continuing the example above, we wanted to create a research overview page, a list of research with summary, image, and link to the research details page.
- Format: How the content will be displayed, can be a list, table or grid
- Show: Can pull through individual fields from the custom content type, or the entire content
- Fields: These are the items pulled into the view. There are many customizable options within each field, for example "Content: Body" is the field that contains both the entire body of text, and the summary field. It has been customized to use the summary for this view.
- Filter criteria: Only show published page, only show our custom content type in this view.
- Sort criteria: Use the date field to sort the list
Once the view has been customized, it can be added to a page as a custom block:
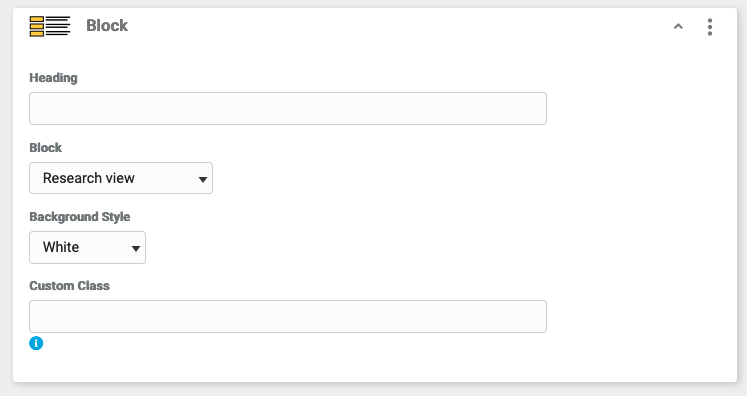
The research details pages have data in one place, and that data is pulled into our overview:

Below is some additional general information on views.
Views
A view simply takes data from your website and displays it to the user. The power of Drupal views keeps your content in one place for editing purposes, with the ability to display that content in multiple places.
Creating a view
Go to Structure > Views > Add View and follow the instructions to select what kind of content you want to display. Select Create a block and choose Bootstrap Grid and fields for the display format.
Styling a view
The College Drupal Distribution has custom views plugin called Bootstrap Grid, which allows view content to be styled into a grid of rows and columns. It has several options for styles including white, gray boxes, cards, card groups, and a masonry type layout.
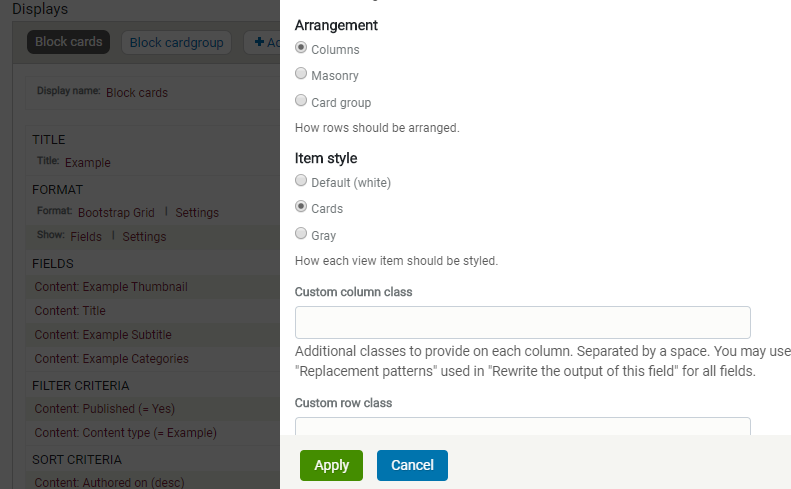
When using the card option, you can add additional bootstrap classes to view fields such as card-title, card-body, card-footer to take advantage of various bootstrap card features. Find more info on bootstrap cards at https://getbootstrap.com/docs/4.3/components/card/
The template is very basic which allows for freedom and customization, so don't be shy about working with some of the additional bootstrap classes.
For example, the content you want as the body of the card: "Configure field" > "Style settings" > check "Customize field HTML" > "div" (a block level full width element) > check "Create a CSS class" > add "card-body"
Some tips:
- Item style: Cards - uncheck provide default wrappers, the CSS will be applied to the wrong element and break the cards layout.

More information: https://drupalize.me/series/user-guide/views-chapter