Most of the content of a site will be editable through the WYSIWYG editor. The WYSIWYG editor is the text area and toolbar which allows you to add formatted text, upload images and files, and embed icons.

- Select some text
- Click the Link button in the toolbar
- Type or paste a link (if it's a link to a page or file on the same website, use a relative URL)
- Click save
- Optional: with the text still selected, click on the Styles dropdown in the toolbar and select a button color

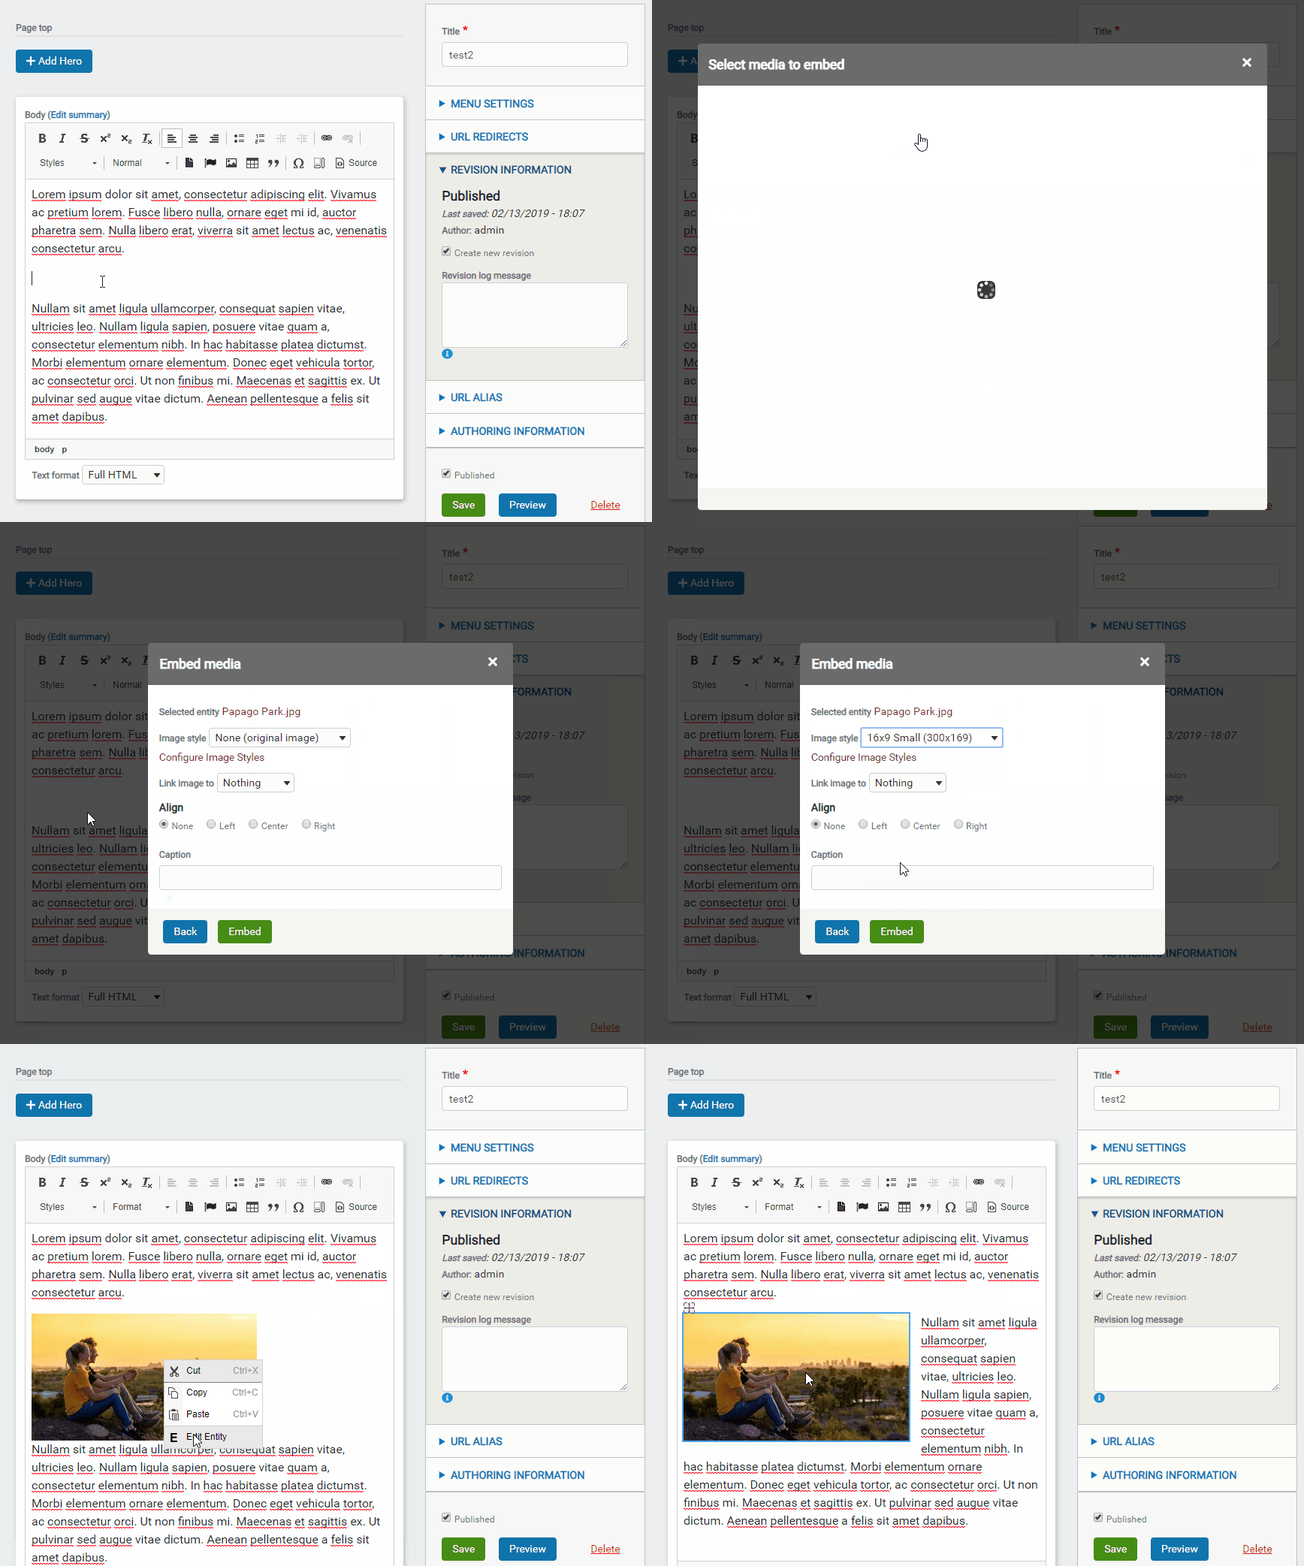
- Position the text cursor where you want to add the image in the WYSIWYG text area.
- Click on the image button in the toolbar
- You can upload a new image or select a previously uploaded image by clicking on the library tab
- After selecting the image, you can configure how it is displayed by changing its size via the image style dropdown, align it left/right, or add a caption.
- To change the configuration on the image later, right click on it in the text area and click edit.
There are two ways to link to a file. Option 1 is easier, but uses the file name for display. Option 2 is flexible and can be formatted into a button or other style.
Option 1: Embed via WYSIWYG
- Position the text cursor where you want to add the file in the WYSIWYG text area.
- Click on the file icon in the toolbar.
- Upload a new file or select a previously uploaded file from the Browse site files tab.
Option 2: Use a file link
- Go to Shortcuts > Add media/file in the admin menu (open in a new tab/window if you don't want to navigate away from your current page).
- Select File, upload your file and give it a name.
- Before you save the file (you can always come back to this page as well), copy the file path.
- Image

- In the WYSIWYG editor, select some text and click the link button
- Paste the url selected in step 3
- Click save